
Building a Mini UZI
|
|
Building a Mini UZI |
Ever wanted to build your own semi-auto Mini UZI?
UZI Talk member suka5168 did and he documented the process. The photos below should help anyone trying to do their own build. The project may or may not save you money, depending on how good a price you can get on parts, but it's a rewarding project.
suka5168 did the entire project with basic tools: a Black & Decker drill , $29 grinder, $1.99 hack saw, a Dremel tool, one single lonely hand file, and a cheap flux MIG welder. He also had a copy of the D&D weld up process booklet, which shows the steps in detail.
Parts costs for the project were:
Receiver
from D&D $19.99
Weld kit $100
Back Plate kit $55
Stock $80
Lower $80
Barrel $19.99
Bolt $4.99
Striker $75
Op rod/ Spring assembly. $35
Buffer $4.99
Pistol Grip $15
Fore Grips $25
Front and rear sights $10
Fore Sling swivel $7
Barrel Nut $10
Barrel nut catch $10
Top Cover $4.99
Cover Plate (with warning) $15
Cocking Knob / lug $10
Cover Catch $10
Rear Leaf spring $5
Be sure you have no more than 10 imported parts to
meet 922r compliance.
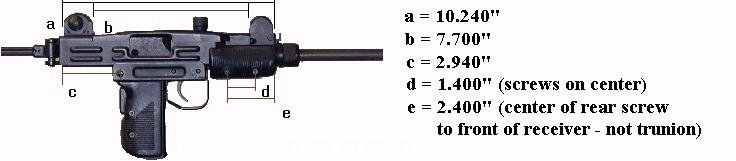
Here are some measurements that will help plan your project:

|
The project started with a $19.99 Group
Industries serial numbered receiver from D&D. As it came from D&D, the
receiver was in the white and had some sort of white coating on it. A few
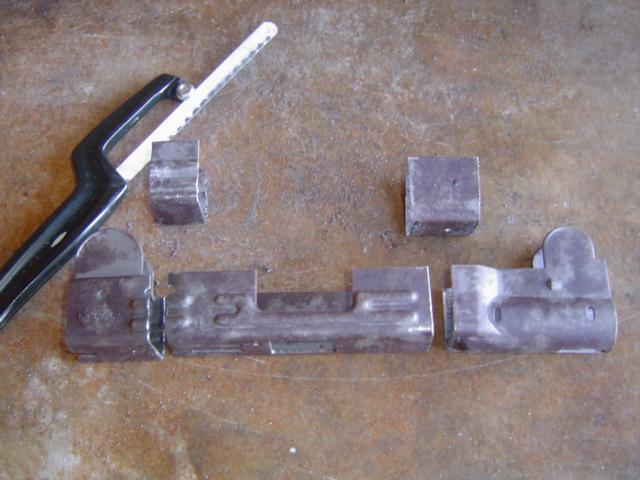
weeks in a tropical climate has put a light layer of rust on it. To convert
the receiver into a Mini UZI, two sections needs to be cut out of the
receiver and then the three pieces welded back together.
|
 |
|
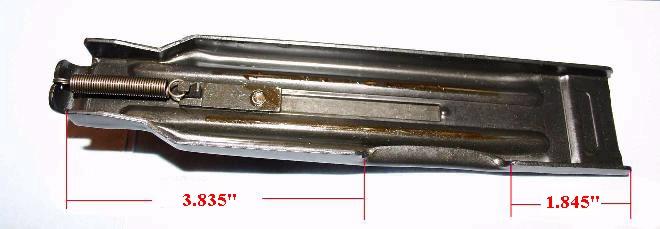
The rivet hole for the ejector is the reference point on all Group Industry receivers. Every measurement should be taken from its center. If for any reason the other opening are off DO NOT enlarge or move this hole. Instead, rework the other slots. Here's the three sections of the receiver that will be kept.
|
 |
|
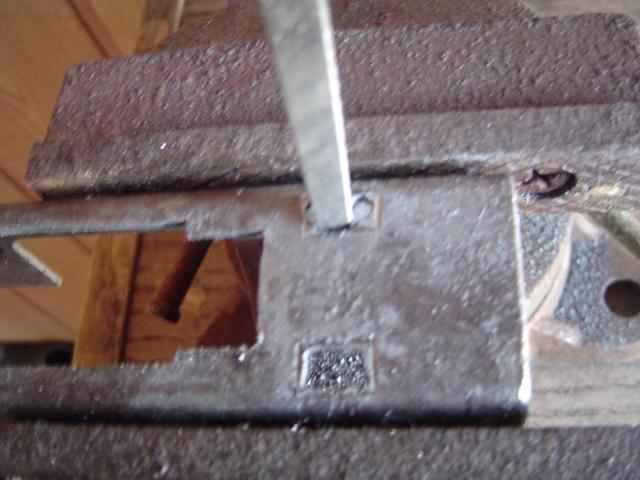
Sear holes are drilled out and then the edges filed square.
|
 |
|
A complete view of what the bottom of the receiver should look like.
|
 |
|
A U.S. made trunion in the white.
|
 |
|
The Mini UZI trunion is skeletonized to
minimize weight. I started by drilling holes in the top and bottom.
|
 |
|
Then I finished cutting the large holes by hand.
|
 |
| The Group Industries receivers are really out of spec. I made this jig out of a piece of brass so I could bend the sight ears to the proper shape. The Mini back plate is different from the full size UZI. It has no hole in it and it has the stock hinge welded on. I was able to get one from Vector. |
 |
|
I started with a brand new full size UZI top
cover from CDNN and needed to make it look like a factory Mini UZI top
cover, as shown below.
|
 |
|
The center
section of the top cover was removed.
|
 |
|
The D&D front sight tower is drilled for Model A sights, but the Mini UZI uses model B sights. I welded a plate over the original hole and redrilled it with a 6.9 drill bit and taped with a 7 x 0.5 tread chaser sold by D&D.
|
 |
|
All the parts are now cut to size and the welding can begin! I made an alignment bar to go through the trunion, ramp, and a rear alignment jig I also made. I did all the welding myself with a Lincoln 135 MIG welder. I don't have any CO2 so it will be flux welded. I'll clean up the splatters afterwards. |
 |
|
Top cover welded and ground down.
|
 |
|
Receiver welded together and top cover fitted
on.
|
 |
|
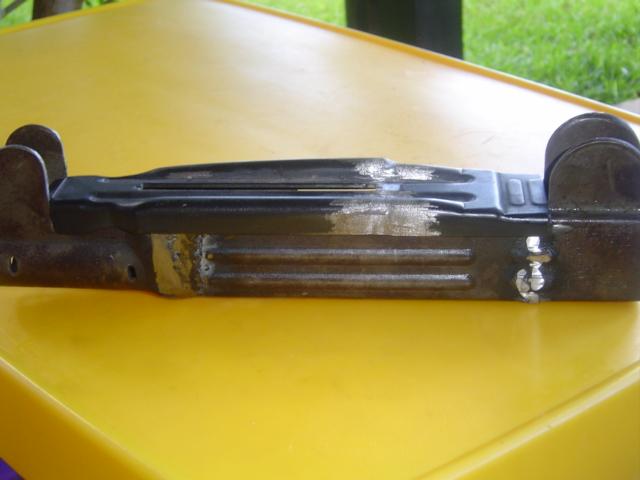
On a factory Mini UZI (shown here), a plate is welded to the bottom of the
receiver. It holds the tongue on the front of the pistol grip assembly. The
Mini UZIs are made this way instead of pressing the pocket out of the bottom
of the receiver like the full size UZI.
|
 |
|
I made this piece from one of the
receiver sections that was cut off.
|
 |
|
I started with a surplus SMG lower.
|
 |
|
Then I welded in a plate (made from some scrap metal) to the inside of the grip assembly to prevent the selector bar from going all the way forward to the full auto position. |
 |
|
One of the sear pads has to be cut off the SMG sear so it won't catch the striker assembly on the closed bolt Mini UZI. The sear on the right is an original full size UZI sear with two pads. The sear on the left has one of the pads cut off.
|
 |
|
Here are the all the parts preassembled to test
fit and alignment.
|
 |
|
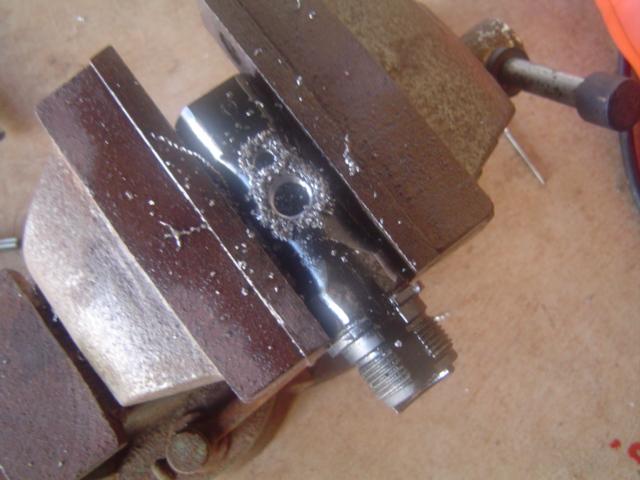
Here's the trunion welded into place and the barrel inserted showing proper alignment. I had to drill out and reweld the tunion to fix a slightly uneven tilt within the reciever. (The gold color in the photo is just reflection from the flash.) Note that the trunion is not relieved on the bottom so a full auto open bolt with feet cannot be used in the gun, per ATF regulations. |
 |
|
The lug holding on the foregrip was from a full size UZI and had to be made shorter. Here's a photo of the lug from a factory Mini UZI. |
 |
|
All the rest of the welding can be completed (bayonet lug, lugs to hold the back of the pistol grip and foregrip, front & rear sight brackets.) The lug that holds on the back of the pistol grip is available from D&D with either an 8mm or 9mm hole, depending on whether you want to use a full auto or semi-auto grip frame. The lug is made for the full size UZI and has the ledge that the folding stock catches on. The back half of the lug should be cut off for the Mini UZI so it's even with the back of the grip frame. The worst part of the whole project was to drill the front sight hole and rear sight mount hole. I welded over and drilled out about 4 -5 times due to misalignments. With all of the welding complete, the receiver is cleaned up and ready for a paint job. |
 |
|
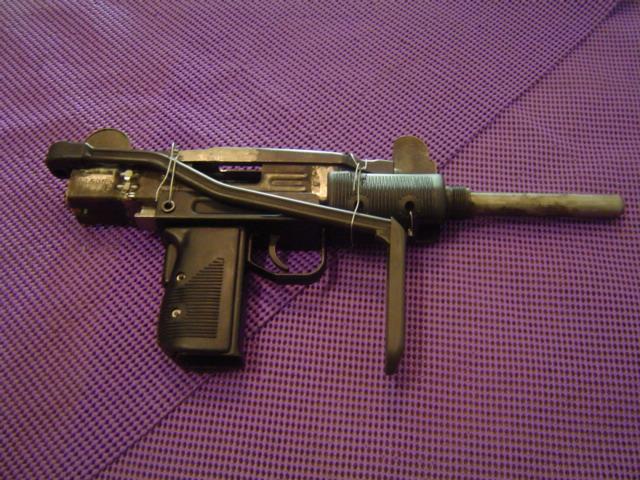
With a temporary stock pin in place, it's off to the range for an initial test. It ran flawlessly with no hick-up, jams or misfires! |
 |
|
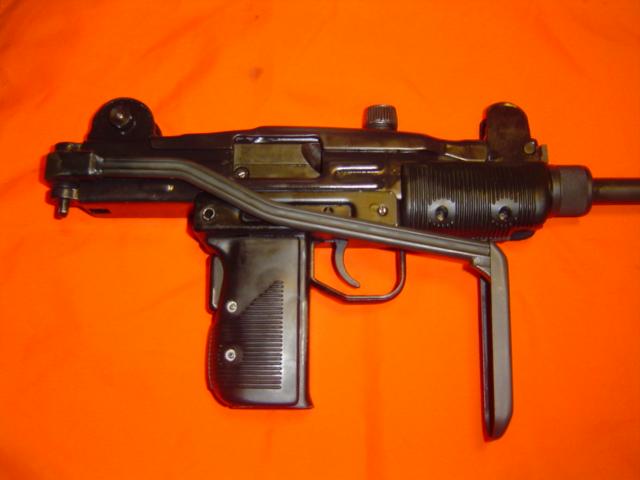
Here's the final result - the left side. |
 |
|
And the right side.
|
 |
Copyright © 2002-2017, UZITalk.com
International copyright laws
DO apply to
Internet Web Sites!
All Rights Reserved.
Last Modified: May 27, 2017
Contact:
librarian@uzitalk.com